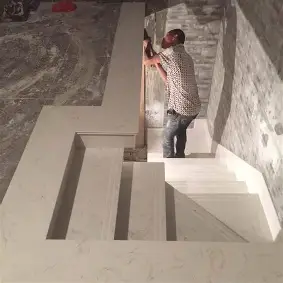
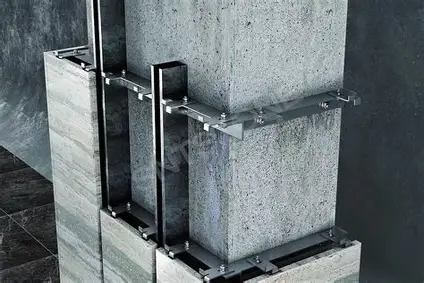
Marble slab is synonymous with timeless elegance and luxurious design. Whether you’re revamping a modern bathroom, designing a grand entryway, or cladding a commercial facade, knowing how to install marble slab on a wall is crucial for both aesthetic appeal and structural integrity.
This guide explores step-by-step techniques, tools required, and key safety considerations—helping you install marble slabs correctly whether you’re a DIY enthusiast or professional contractor.

Why Install a Marble Slab on Walls?
Marble slabs aren’t just for flooring or kitchen countertops anymore. Wall cladding using polished marble slabs, honed marble slabs, or even engineered marble slabs has surged in popularity. Key reasons include:
- Elevated aesthetics: Adds grandeur to bathrooms, lobbies, and living rooms.
- Durability: Properly installed slabs offer excellent wear resistance.
- Value boost: Adds resale value to residential and commercial properties.
For more insights into what qualifies as a marble slab, read: What Is a Marble Slab?

Tools and Materials Required
Before beginning the installation, gather these essentials:
- Marble slab (cut to wall size)
- Notched trowel
- White thin-set mortar or epoxy adhesive
- Tile spacers
- Level
- Tile saw (for cutting)
- Marble sealer
- Grout (non-sanded recommended)
- Safety gear: gloves, eye protection, dust mask
Step-by-Step Guide to Installing Marble Slab on Walls
Step 1: Prepare the Wall Surface
Ensure the wall is:
- Clean and free from dust, grease, or debris.
- Flat and structurally sound.
- Primed (if necessary) to improve adhesion.
Step 2: Measure and Plan
Measure the marble slab size and dry-fit it against the wall to visualize layout. Mark alignment lines using a level.
Tip: Always plan from the center outwards for symmetry, especially in decorative applications like marble slab backsplash or shower wall cladding.
Step 3: Apply the Adhesive
Use a notched trowel to spread a layer of white thin-set or marble adhesive evenly on the wall.
Avoid grey mortar, as it may stain white marble slabs like Carrara or Calacatta Gold.
How Much Does a Calacatta Gold Marble Slab Cost?
Step 4: Mount the Marble Slab
- Carefully press the slab onto the adhesive.
- Use spacers for even joints.
- Tap lightly with a rubber mallet to remove air pockets.
- Confirm vertical alignment using a level.
For large installations like marble slab shower walls, you may need additional support while curing.
Step 5: Let It Cure
Allow the adhesive to cure as per manufacturer’s recommendations (usually 24–48 hours).
Step 6: Grouting and Sealing
- Apply a non-sanded grout between the marble seams.
- Once dried, clean and apply a marble sealer to protect against stains and moisture.
- Buff with a soft cloth to enhance the finish.
For cutting needs, refer to:
How to Cut a Marble Slab?
How to Cut Marble Slab at Home?
Common Applications for Marble Slab Wall Installations
- Bathrooms: Ideal for backsplashes and shower enclosures.
- Living rooms: Accents walls or fireplaces.
- Commercial spaces: Hotel lobbies and retail interiors.
Tips for a Flawless Marble Slab Installation
- Always pre-seal porous marble varieties before installation.
- Avoid acidic cleaners post-installation—opt for neutral pH solutions.
- Ensure proper ventilation if using epoxy adhesives indoors.
FAQs
Can I install a marble slab by myself?
Yes, but it requires patience, tools, and some muscle—especially for heavy marble slab sizes or full-height wall cladding.
How much does marble slab installation cost?
Costs vary depending on marble slab price, local labor rates, and installation complexity. DIY can save money, but may require more time and effort.
Conclusion
Installing a marble slab on a wall is a sophisticated way to elevate any space. With proper preparation, tools, and attention to detail, your installation will look professional and last for years.
To continue your marble journey:

