
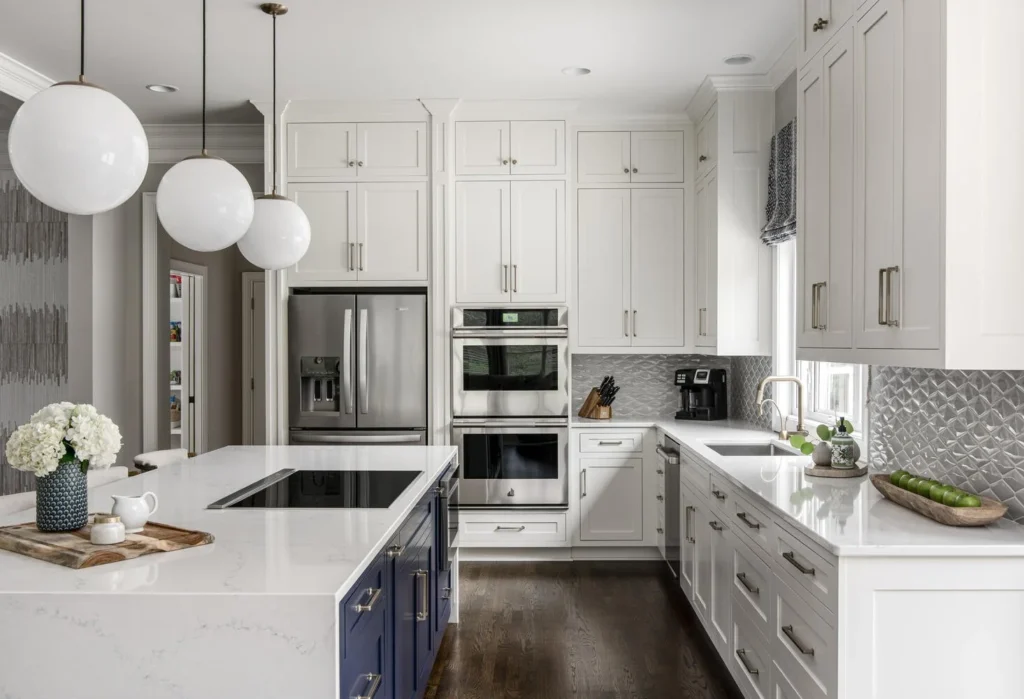
Granite countertops are prized for their natural beauty, durability, and timeless appeal. But one question keeps popping up with new installs and older kitchens alike: do you have to seal granite countertops? Short answer: in most homes, yes—and sealing is simple, affordable, and the best way to keep granite stone looking its best while resisting oil and water stains. In this guide, you’ll learn exactly when sealing is necessary, how often to do it, what products to use, and how sealing fits into your wider care routine (cleaning, polishing, stain removal, repairs, and budgeting).
Pro tip for fabricators and DIYers moving heavy slabs: use the right lifting/transport equipment to protect both the stone and your back. Explore professional gear at Toolrange.

Why Granite Needs Sealing (Sometimes)
Granite is a natural vs. engineered stone with a crystalline structure (quartz, feldspar, mica) and microscopic pores. Those pores can absorb liquids—particularly oils, wine, coffee, cosmetic products, and dye-based cleaners—leaving dark spots or halos. A quality impregnating sealer fills those pores below the surface so spills sit on top, buying you time to wipe them away.
- Dense, dark granites (some blacks and greens) are often less porous.
- Light-colored granites (creams, whites, and some greys) and honed/leathered finishes tend to be more absorbent and benefit most from sealing.
- Granite bathroom vanities see lotions and makeup; kitchen granite meets oils and acids—both environments make sealing smart.
If you’re weighing options like granite vs quartz countertops, note that many quartz (engineered stone) brands don’t require sealing. But with the right routine, granite remains a low-maintenance natural stone with unmatched character and heat resistance.

Do You Have to Seal Granite? The Real Answer
You need to seal when your specific slab demonstrates absorption. Not all granite is equally porous. That’s why pros rely on simple, repeatable tests instead of blanket rules.
The 60-Second Water Test (At Home)
- Clean a 6″ x 6″ area with a pH-neutral stone cleaner and dry thoroughly.
- Place a teaspoon of water on the surface.
- Watch for darkening:
- Darkens in 1–5 minutes: Very porous. Seal now (usually 2 coats).
- Darkens in 5–15 minutes: Moderately porous. Seal now (1–2 coats).
- No change after 30 minutes: Very dense. Consider sealing seams/edges and retest in six months.
Do this test in multiple zones: near the sink, cooktop, dishwasher, and high-traffic worktops.
What Kind of Sealer Should You Use?
Choose an impregnating (penetrating) sealer specifically labeled for granite/natural stone and designed to resist both water and oil. Avoid topical “coatings” that form films; they can haze, peel, or alter the tactile feel of stone.
Water-Based vs. Solvent-Based
- Water-based: Low odor, easy cleanup, great for most granites.
- Solvent-based: Slightly deeper penetration on certain dense stones; ensure excellent ventilation.
Enhancing Sealers (Optional)
These deepen color and highlight movement/veins—popular for honed or leathered surfaces and some black granite countertops. Always test first; enhancement is a one-way street without resurfacing.
Need a step-by-step? These deep dives are helpful:
- How to Seal Granite Countertops
- How to Seal Granite: A Complete Stone-Safe Guide for Long-Lasting Beauty
- How to Seal Granite Countertops for the First Time
- Stonefabber: First-Time Sealing Walkthrough
How to Seal Granite (Fast, Clean, and Streak-Free)
You’ll need: pH-neutral stone cleaner, microfiber cloths, painter’s tape, gloves, your chosen sealer, applicator pad (foam/microfiber), and lint-free towels.
1) Prep & Mask
- Clean thoroughly with a stone-safe cleaner; rinse and dry.
- Tape along backsplashes, fixtures, and wood trim.
2) Test in a Discreet Spot
Confirm no unwanted color change (unless using an enhancing sealer intentionally). Also confirm residue wipes perfectly clear.
3) Apply Like a Pro
- Work in 2–3 ft sections.
- Apply enough sealer to wet the surface evenly (not puddling).
- Keep the area visibly wet for the label’s dwell time (often 5–15 minutes). Add a bit more if it flashes off quickly—especially at edges, cutouts, and seams.
- Wipe off all excess before it dries on the surface.
- Immediately buff crystal clear with fresh microfiber.
Key rule: impregnators belong in the stone, not on it. If you feel a film, re-wet with more sealer and buff clean.
4) Second Coat?
First-time sealing on white granite countertops, grey granite, or honed/leathered finishes usually benefits from a second coat. Follow the recoat window specified on the label (often 10–30 minutes after the first wipe).
5) Cure Time
- Light use after a few hours (product-dependent).
- Avoid spills for 24 hours.
- Full cure typically 24–72 hours.
How Often Should You Reseal?
It depends on the stone and how you use your kitchen or bath. A general rhythm:
- High-use kitchens (lots of cooking oils/wine): test every 6–12 months.
- Dense polished darks: may go 2–3 years between seals (seams/edges still benefit).
- Granite bathroom countertops: cosmetics and lotions are oily—test annually.
Always let the water drop test guide your timing rather than the calendar.
Cleaning & Daily Care After Sealing
What to Clean Granite With (Everyday)
- Use a pH-neutral stone cleaner or a drop of mild dish soap in warm water.
- Rinse with clean water and buff dry to avoid streaks and mineral spots.
- Avoid harsh chemicals (acidic/alkaline), abrasive powders, and scouring pads that can dull polish or degrade the sealer.
Disinfecting & Sanitizing (Food-Safe Routine)
- Clean first (soil removal).
- Lightly mist 70% isopropyl alcohol, let it dwell briefly, then wipe and dry.
- Daily “sanitizing” sprays marketed for stone are fine; avoid frequent use of bleach, ammonia, or quats on sealed stone.
Polishing Granite Surfaces
Stone-safe polishes add luster and slickness but aren’t a substitute for sealing. Use after the sealer has fully cured.
Stains, Chips, and Polishing: What If Something Goes Wrong?
- Oil stains: Use a stone-approved poultice (commercial or pro-level DIY). After removal, reseal that spot.
- Organic stains (coffee/wine): an oxidizing stone poultice helps—avoid chlorine bleach on sealed tops.
- Repairing chips in granite: tiny edge chips can sometimes be repaired with clear resins; larger ones are for a professional.
- Polishing dull zones: residue haze? Re-wet with a bit of the original sealer and buff perfectly clear. For finish restoration, call a stone refinisher.
Granite vs. Quartz, Marble & Soapstone: Where Sealing Fits In
- Quartz (engineered): generally does not need sealing, but can be sensitive to heat and certain solvents.
- Marble: more porous and acid-sensitive; sealing helps but does not stop etching from acids (lemon juice, vinegar).
- Soapstone: non-porous; typically enhanced with oil/wax instead of sealed.
- Granite: a great natural stone countertop comparison winner if you value heat resistance, unique veining, and long-term durability with easy upkeep.
If you’re price-shopping, remember granite countertop cost includes slab grade, finish, edge profiles, cutouts, and installation—not just the stone. Sealing adds only a small, occasional maintenance step that protects that investment.
Special Notes by Color & Finish
- White & light granites: more absorbent; do the water test more often and expect two coats at first sealing.
- Black granite countertops: often denser; test anyway and seal seams/edges. If you want richer color on honed/leathered black, consider an enhancing sealer (test first).
- Polished vs. Honed/Leathered: honed and leathered frequently need more product and meticulous buffing to avoid uneven sheens.
Installation, Showrooms & Sourcing Tips
When shopping where to buy granite countertops (local showrooms, wholesale granite suppliers, or fabricators):
- Perform a quick water test on the actual slab you plan to buy.
- Ask if the slab was factory-treated and how that affects resealing intervals.
- Review edge profiles, backsplash designs, and compatibility with your cabinet colors for a cohesive look.
FAQ: Quick Answers
Q: Do new countertops arrive pre-sealed?
A: Some do. Always ask your fabricator and still perform the water test at home.
Q: Does sealing change the look?
A: Standard impregnators are invisible when applied correctly. Enhancing sealers deepen color/contrast intentionally.
Q: Can I skip sealing because I have dark, dense granite?
A: You might not need frequent sealing on the field, but edges, seams, and high-use zones typically benefit. Test to be sure.
Q: Will sealing prevent etching?
A: Etching is usually a marble problem; granite is less acid-sensitive. Sealing prevents staining, not etching.
Step-By-Step Resources (Bookmark These)
- How to Seal Granite Countertops
- How to Seal Granite: A Complete Stone-Safe Guide for Long-Lasting Beauty
- How to Seal Granite Countertops for the First Time
- Stonefabber: First-Time Sealing Walkthrough
Bottom Line
Do you have to seal granite countertops?
Most homeowners should, because sealing:
- Dramatically reduces staining
- Simplifies daily cleaning
- Preserves polish and color on white, black, and grey granite countertops
- Extends the life and value of your natural stone
Use the water test to decide, choose a high-quality impregnating sealer, and apply with the wipe-and-buff method. In under an hour, you’ll boost protection for years—and keep your kitchen or bath looking stunning with minimal maintenance.
If you’re getting hands-on with moving or installing stone, don’t forget safety and efficiency gear at Toolrange.