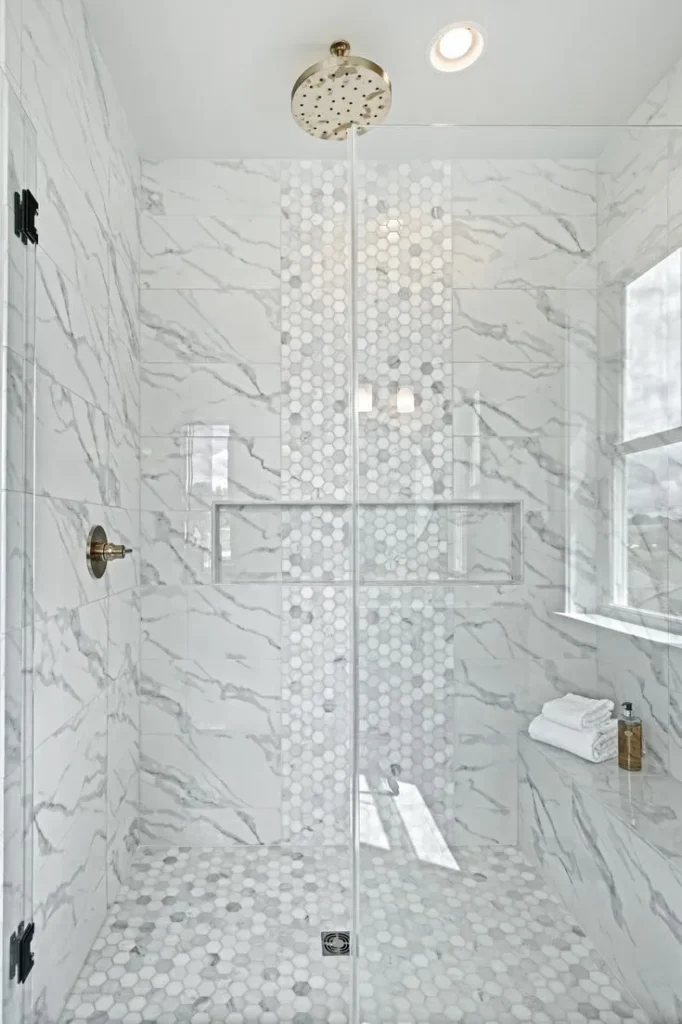
Adding a marble slab to your shower instantly elevates its aesthetic and value. Sleek, seamless, and luxurious, marble shower panels offer unmatched elegance and practicality. Whether you’re using natural marble slabs, engineered marble, or even Carrara marble slabs, the right installation method ensures long-lasting performance in a moisture-rich environment.
In this guide, we’ll walk you through the complete process of how to install a marble slab in a shower—including preparation, waterproofing, installation, sealing, and maintenance—so you get the best results for your investment.

Why Choose a Marble Slab for Showers?
Unlike tile installations with multiple grout lines, marble slabs offer a cleaner, more cohesive look with fewer seams. They’re also easier to maintain and provide better moisture resistance when sealed properly.
Key Benefits:
- Elegant, spa-like appearance
- Seamless surface for easy cleaning
- Customizable marble slab colors and finishes
- Enhances home resale value
- Long-term durability and water resistance
👉 Learn more about stone types in What Is a Marble Slab?

Tools and Materials You’ll Need
- Pre-cut marble slabs (or cut-to-fit)
- Waterproof backer board (cement board or foam panels)
- Construction adhesive or epoxy
- Notched trowel
- Silicone caulk
- Level and tape measure
- Marble sealant
- Grout (non-sanded if applicable)
- Clamps or temporary supports
- Painter’s tape and soft cloths
- Safety goggles and gloves
Step-by-Step: How to Install Marble Slab in Shower
Step 1: Prep the Shower Area
- Remove old wall materials down to the studs if needed.
- Install a waterproof backer board like cement board or Schluter® Kerdi Board.
- Tape and seal seams with waterproof membrane or sealant.
Tip: Ensure proper slope and drainage in the shower base before installing vertical surfaces.
Step 2: Measure and Dry-Fit the Marble Slab
- Measure each wall section carefully and note marble slab size.
- Dry-fit the slabs to check for alignment and gaps.
- Mark plumbing locations for faucets and showerheads; pre-drill holes as needed.
Need help cutting? Learn How to Install Marble Slab Floor and How to Install Marble Slab Backsplash
Step 3: Apply Adhesive
- Use white thin-set mortar or a premium construction adhesive rated for wet environments.
- Spread adhesive on the backer board using a notched trowel.
- Back-butter the marble slab to ensure full contact.
Avoid grey adhesives—they can discolor lighter marble like Italian marble slabs.
Step 4: Mount the Marble Slab
- Carefully press the slab against the wall, starting from the bottom.
- Use shims or spacers to maintain even spacing if installing multiple panels.
- Tap gently with a rubber mallet to remove air pockets.
- Check alignment using a level.
- Let set for 24–48 hours before sealing joints or applying weight.
Step 5: Seal and Finish
- Use silicone caulk to fill gaps at corners, edges, and where slabs meet the base pan.
- Apply a marble slab sealer to protect from moisture and stains.
- Buff with a clean, soft cloth.
- Re-seal every 6–12 months depending on use and water hardness.
Maintenance Tips for Shower Marble Slabs
- Clean regularly with a pH-neutral cleaner.
- Avoid bleach, vinegar, or acidic soaps.
- Wipe surfaces after each use to reduce water spots.
- Reseal annually or as needed depending on marble porosity.
Ideal Marble Slabs for Shower Installations
- Polished marble slab: Glossy and reflective, perfect for visual drama
- Honed marble slab: Matte and more slip-resistant, great for wet environments
- Engineered marble slab: Consistent in color, often more budget-friendly
- Natural marble slab: Unique veining and texture, timeless appeal
Common Challenges (And How to Solve Them)
| Problem | Solution |
|---|---|
| Slabs are too heavy | Use proper supports and a helper; consider thinner slabs |
| Moisture concerns | Use waterproof backer boards and high-quality sealants |
| Seams not flush | Sand lightly and fill gaps with color-matched caulk |
| Discoloration over time | Reapply sealant and avoid acidic cleaners |
Marble Slab in Showers: FAQs
How much does a marble shower slab cost?
- Marble slab cost ranges from $40–$200 per sq. ft. depending on stone type, finish, and thickness.
- Installation cost adds $20–$40 per sq. ft. for labor, adhesive, and sealing.
Can I install it myself?
Yes—especially if you have experience with tile or wall panels. However, large or heavy slabs often require a second person and special tools.
What thickness is best for shower marble slabs?
2 cm (¾”) is standard. Thicker slabs offer more durability but require reinforced support.
Final Thoughts
Installing a marble slab in your shower is one of the most rewarding upgrades for both style and functionality. By following this detailed guide—from prep to sealing—you can achieve a seamless, durable installation that transforms your bathroom into a luxurious spa-like space.
Whether you’re using Calafate marble slabs, black marble slabs, or white Carrara marble, the process remains largely the same: careful prep, quality materials, and attention to detail.

