
A marble slab adds elegance, value, and timeless appeal to any space—be it a kitchen countertop, bathroom vanity, fireplace surround, or feature wall. However, despite its luxury and beauty, marble is a natural stone that can crack or break under heavy impact, stress, or mishandling.
If you’ve recently experienced a chipped or cracked marble slab, don’t panic. This comprehensive guide will teach you how to repair it safely and effectively, restoring both its structural integrity and visual appeal.

Why Do Marble Slabs Crack or Break?
Marble slabs can break due to several reasons, including:
- Improper installation or insufficient support beneath the slab
- Heavy objects dropped on the surface
- Temperature fluctuations in outdoor settings
- Poor handling during transport or marble slab cutting
- Aging adhesives or settling structures
Learn more about marble characteristics in: What Is a Marble Slab?
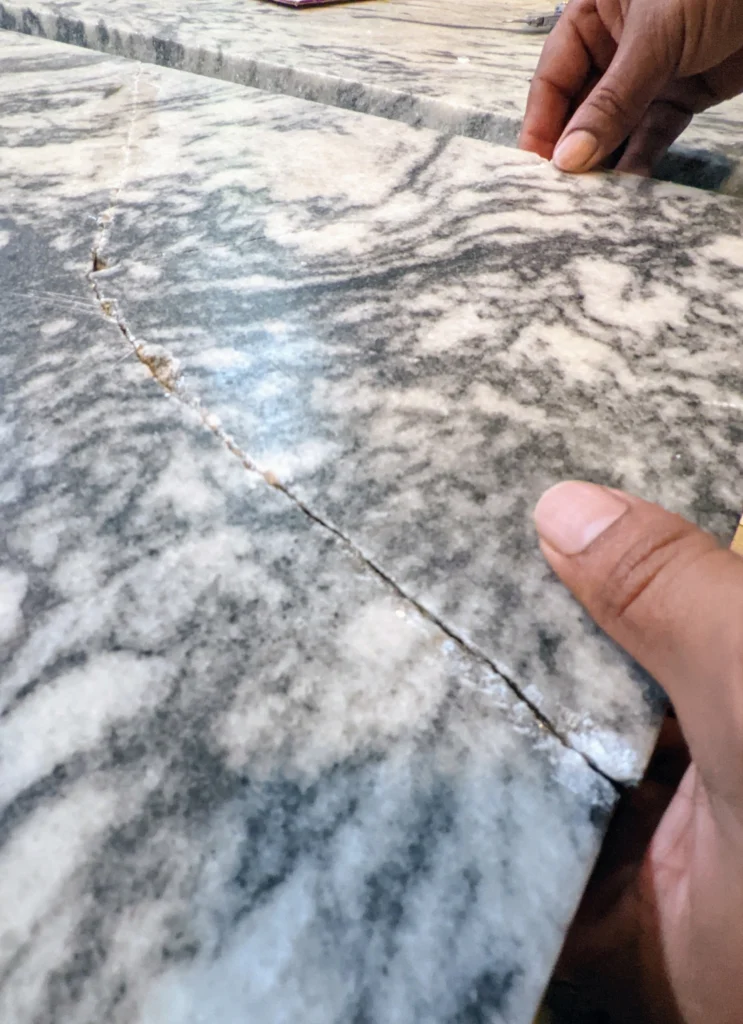
Types of Marble Slab Damage
- Hairline cracks – thin surface fractures
- Full breaks – slab splits into two or more pieces
- Chips or dents – usually on edges or corners
- Surface damage – minor impact blemishes
Each requires slightly different materials and techniques for repair.
Tools & Materials Needed
- Epoxy adhesive or marble-specific stone glue
- Painter’s tape
- Putty knife or plastic spatula
- Acetone or alcohol (for cleaning)
- Fine-grit sandpaper (400–600 grit)
- Marble polishing compound
- Polished or honed finish touch-up kit (optional)
- Clamps (for larger slabs)
Step-by-Step: How to Repair Broken Marble Slab
Step 1: Clean the Broken Area
Before any bonding, you must clean the damaged area thoroughly:
- Wipe both surfaces with acetone to remove dust, oils, and old adhesive
- Use a soft cloth to dry the area
- Ensure the broken pieces fit tightly together
Tip: If there’s debris inside a crack, use compressed air to blow it out gently.
Step 2: Prepare the Epoxy Adhesive
Choose a two-part epoxy formulated for stone and mix according to manufacturer instructions.
- For white marble slab, use clear or color-matched epoxy
- For black marble slab or green marble, darker adhesives may be used
- Mix only what you can apply within 10–15 minutes
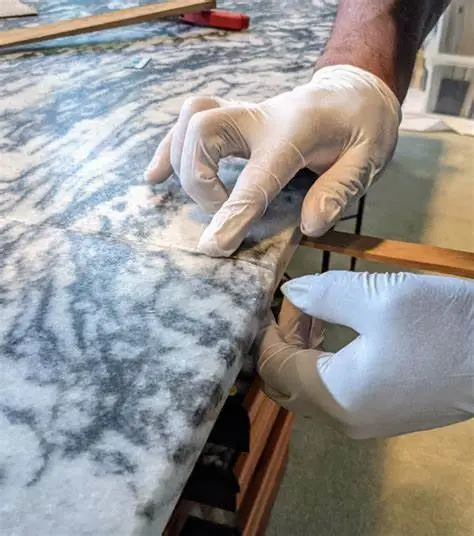
Step 3: Apply the Adhesive
- Apply a thin layer of epoxy to both broken edges
- Press the pieces together firmly
- Use painter’s tape to secure the bond in place
For large marble slabs (like countertops or hearths), use clamps to hold the pieces together evenly.
Step 4: Let It Cure
Allow the adhesive to cure for at least 24 hours (or as directed). Do not disturb or apply pressure during this period.
Step 5: Sand and Smooth the Joint
- Once dry, gently sand any excess glue with fine-grit sandpaper
- Be cautious not to scratch the surrounding marble surface
- Clean away any residue with a dry cloth
For more surface tips, see: How to Remove Scratches from a Marble Slab
Step 6: Polish and Seal
- Apply marble polishing compound to the repair zone
- Buff using a soft cloth or a low-speed polisher
- Apply marble slab sealer to protect the repaired area from future staining
When to Call a Professional
Some marble slab repairs are best left to experts, especially if:
- The break runs through a load-bearing countertop
- The slab is custom-cut or rare (like Italian marble slabs)
- The repair affects plumbing or electrical cutouts
Preventing Future Damage
- Use cutting boards and coasters on countertops
- Avoid standing or sitting on slab surfaces
- Use proper support under long spans of marble
- Apply sealant regularly for protection
- Be cautious during transporting or moving marble slabs
More handling advice here: How to Remove Marble Slab from Fireplace
FAQs
Can a cracked marble slab be glued back together?
Yes. Epoxy adhesives are strong enough to permanently bond broken marble pieces—especially if surfaces are clean and joined tightly.
Will the crack always be visible?
Depending on the polish and color, small cracks can be almost invisible after sanding, polishing, and sealing. Color-matched adhesives help blend the repair.
What if I need to cut the slab before repairing?
If trimming or resizing is required, do it before bonding, using a wet saw with a diamond blade designed for natural stone.
Final Thoughts
Repairing a broken marble slab isn’t just possible—it’s a cost-effective alternative to replacement. Whether you’re fixing a chipped kitchen countertop, a cracked bathroom vanity, or a broken fireplace surround, taking the time to restore your slab properly can save you money and preserve your investment.
With the right tools, materials, and techniques, even novice DIYers can achieve near-invisible repairs—especially when combined with marble slab sealing and polishing.